How a Masonry Seat Wall Can Improve an Outdoor Gathering Space

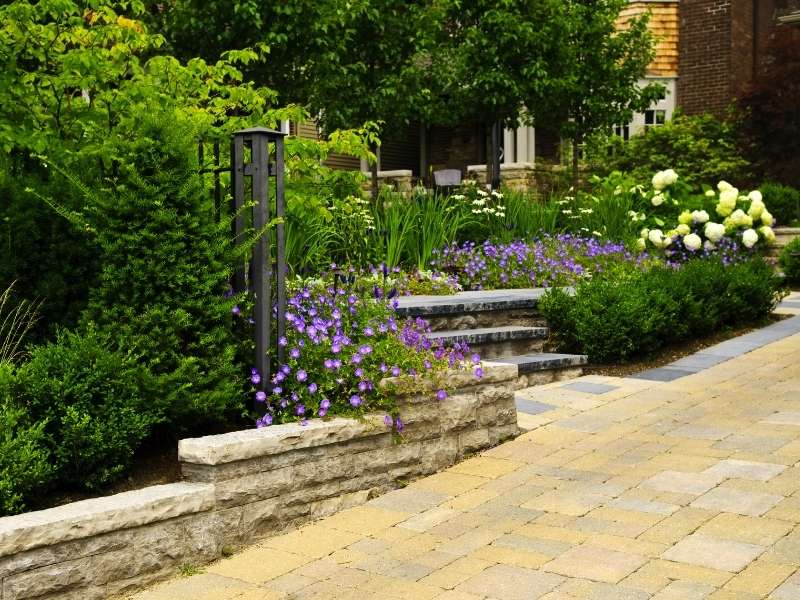
Masonry seat wall in Auburn Alabama adding built in outdoor seating and structure to a landscaped gathering space.

A seat wall does two jobs at once. It gives people a place to sit, and it gives an outdoor space a clear shape. That’s a rare combo in landscape design. Most features either look good or work well, but a seat wall pulls off both without needing extra furniture cluttering up the yard. If you’ve ever hosted a backyard gathering and watched guests hover around with nowhere comfortable to land, a seat wall solves that problem in a pretty simple way.

Creating Defined Outdoor Seating Areas With a Built-In Masonry Feature

Open yards can feel a little aimless without something to organize them. A seat wall changes that fast. It marks off a spot and tells people, without a sign or a fence, that this is where the gathering happens.

That kind of built-in structure gives a yard a sense of purpose. Instead of a wide open lawn where everyone stands around unsure where to settle, a seat wall creates a natural gathering point. Guests drift toward it the way people drift toward a kitchen island at a party. It’s not a retaining wall holding back a slope, and it’s not a patio surface underfoot. It’s a standalone feature built specifically to shape how people use the space around it.

How Seat Walls Add Comfort and Function to Landscape Designs

Extra seating sounds like a small thing until you’re hosting fifteen people and only have room for six chairs. A seat wall solves that instantly, giving guests a place to sit without hauling out folding chairs or crowding around a small table.

Function goes beyond just seating, too. A well-placed seat wall can wrap around a fire pit, line the edge of a patio, or frame a garden bed, doing double duty as both furniture and structure. That combination makes outdoor spaces feel more usable day to day, not just during a party. A yard with built-in seating invites people to actually sit outside and stay a while, instead of walking through it on the way to somewhere else.

Design Options for Masonry Seat Walls That Match Different Home Styles

A seat wall doesn’t have to look like everyone else’s. Shape alone changes the character of the whole feature. A straight run works well for framing a patio edge, while a curved wall softens the space and creates a more relaxed, gathered feeling around a fire pit or seating circle.

Finishes shift the personality further, from a smooth, contemporary surface to a more textured, traditional look that leans into an older home’s style. Cap styles matter more than people expect, too. A wide, flat cap makes the wall genuinely comfortable to sit on, while a narrower cap leans more decorative than functional. Design details like these let a seat wall fit almost any property, whether the home has a modern edge or a more classic feel.

Planning the Location and Layout of an Outdoor Masonry Seat Wall

Placement decides whether a seat wall gets used or just sits there looking nice. Traffic flow matters first. A wall positioned right in the path people naturally walk creates friction instead of comfort, so it needs enough clearance around it for foot traffic to move freely.

Views deserve some thought too. A seat wall facing a garden, a fire feature, or an open part of the yard gives people a reason to actually sit down and stay. Conversation areas benefit from layout choices as well, since walls angled toward each other, rather than lined up in a straight row, make it easier for groups to talk without craning their necks. The wall also needs to connect naturally with the rest of the landscape design, tying into existing paths, patios, or planting beds instead of feeling like it was dropped into the yard on its own.

Long-Term Considerations Before Adding a Permanent Outdoor Seat Wall

A seat wall is a permanent feature, so it’s worth thinking past the first season. Material durability matters a lot here, since the wall needs to hold up to years of sitting, weather, and general outdoor wear without cracking or shifting.

Maintenance expectations vary by material too. Some finishes need almost no upkeep, while others benefit from occasional sealing or cleaning to keep their appearance sharp. Weather exposure plays into that decision as well, especially in regions with harsh winters or heavy sun that can wear down certain materials faster than others. Future outdoor plans are worth factoring in too. A seat wall placed with room to grow around it fits better into whatever changes a yard might go through down the line, instead of becoming an obstacle to work around later.

Frequently Asked Questions

What is a masonry seat wall used for? 

A seat wall provides built-in outdoor seating while also adding structure and shape to a landscape. It works as both a functional feature and a visual anchor for the space around it.

How tall should an outdoor masonry seat wall be? 

Height usually comes down to comfort and intended use. Most seat walls sit around standard chair height so they’re actually comfortable to use, though some homeowners adjust height based on design goals or the wall’s other purposes.

Can a masonry seat wall be added to an existing yard? 

Yes, in most cases. Seat walls can often fit into an existing outdoor space once the layout, traffic flow, and site conditions have been properly considered.

What materials can be used to build a masonry seat wall? 

Several masonry materials work well for seat walls, each offering a different look and feel. Homeowners typically choose based on how the material matches their outdoor style and how much upkeep they want to take on.

Does a masonry seat wall require professional installation? 

Yes, generally. Proper planning, solid construction methods, and the right material selection all matter for building a seat wall that holds up and performs well for years.

Garden Wall Ideas That Add Definition Without Blocking the Yard

Garden wall ideas in Auburn Alabama showing a low masonry wall that adds definition to a landscaped yard while keeping the outdoor space open.
#image_title

A garden wall doesn’t have to close off a yard to be useful. Done right, it adds shape and order while still letting you see clear across the whole space. A lot of homeowners hold back on adding a wall because they picture something tall and heavy, like a fortress cutting the yard in half. That’s not the only option. Short, well-placed walls can mark off flower beds, line a path, or frame a seating area, all while keeping the yard feeling open and connected.

Low Garden Wall Designs That Create Outdoor Separation Without Closing the Space

Height makes all the difference here. A wall that sits low, often just a foot or two off the ground, can still do a lot of work. It marks where one part of the yard ends and another begins, without blocking the view across it.

Planting areas are an easy place to start. A low wall around a flower bed keeps mulch and soil contained and gives the bed a clean edge, without hiding the plants inside it. Pathways benefit too, since a short wall running alongside a walkway guides foot traffic without making the path feel boxed in. Seating zones work the same way. A low wall behind a patio or fire pit creates a sense of enclosure, the kind that makes a space feel intentional, without cutting off the rest of the yard from view. The goal at every step is balance: enough structure to define the space, not so much that it closes it in.

Choosing Masonry Materials That Complement Garden Landscapes

Material choice sets the tone before a single plant goes in the ground. Brick brings a classic, structured look that pairs well with older homes or more formal garden layouts. It’s also easy to match against existing brickwork on the house, which helps the wall feel like part of the property instead of something added on later.

Natural stone leans in a different direction. It fits looser, more relaxed garden styles, and it tends to blend into a landscape rather than stand out from it. Other masonry finishes, like textured concrete block, split the difference and offer a budget-friendly option without giving up too much visual interest. The right choice usually comes down to what’s already there. A wall that echoes the home’s exterior or the yard’s existing hardscape almost always looks more finished than one picked without that connection in mind.

Garden Wall Placement Ideas for Better Yard Flow and Function

Where a wall goes matters just as much as what it’s made of. Borders around flower beds are one of the most common placements, and for good reason. They give planting areas a clear edge and keep the whole yard looking organized instead of scattered.

Walkways benefit from thoughtful placement too. A wall running alongside a path, even a short one, frames the walkway and draws the eye forward without narrowing the space. Entertainment areas, like a patio or outdoor kitchen, often use garden walls to mark boundaries and separate that zone from open lawn. This kind of placement organizes space rather than eating into it, and a yard with clear zones almost always reads as bigger and more thought out than one without any structure at all.

Decorative Features That Make Small Garden Walls Stand Out

A garden wall doesn’t have to be plain to stay light in appearance. Patterns in the masonry, like alternating brick courses or a mix of stone sizes, add texture without adding bulk. These details catch the eye without making the wall feel heavier than it needs to be.

Caps finish the top edge and can shift the whole look of a wall, from a smooth, modern cap to a rougher, more traditional stone top. Curves add another layer of interest, softening what could otherwise be a stiff, straight line running through the yard. Planting combinations tie it all together, with trailing vines or low shrubs planted along the base to soften the wall’s edge and blend it into the landscape.

Planning a Garden Wall That Matches Long-Term Outdoor Use

A garden wall built without a long-term plan tends to cause problems down the road. Maintenance needs deserve real thought before construction starts. Some materials hold up with almost no upkeep, while others need regular sealing or occasional repointing to stay in good shape.

Durability matters too, especially in climates with harsh winters or heavy rain, where some materials handle freeze and thaw cycles better than others. Drainage awareness plays a role as well, since water pooling against a wall base can cause damage over time if it isn’t planned for during installation. Future landscaping changes are worth considering too. A wall built with some flexibility, rather than locked tightly into today’s garden layout, adapts more easily if planting beds shift or new features get added later.

Frequently Asked Questions

How tall should a garden wall be for an open yard design? 

Height depends on the wall’s purpose. A wall meant to define a flower bed can sit just a few inches tall, while one framing a seating area might reach a foot or two. The goal is matching height to function without blocking sightlines across the yard.

Can a garden wall improve the appearance of a small backyard? 

Yes. A well-placed wall adds structure and organization, which often makes a small space feel more intentional and put together rather than smaller or more cramped.

What materials are commonly used for decorative garden walls? 

Brick, natural stone, and textured concrete block are all common choices. Homeowners typically pick based on how well the material matches the home’s exterior style and how much upkeep they’re willing to handle.

Do garden walls require professional planning before installation? 

Yes, in most cases. Layout, material selection, and site conditions like drainage and soil type all affect how well a wall performs over time, so planning ahead helps avoid problems later.

How can plants be incorporated around a garden wall? 

Flowers, low shrubs, and trailing greenery planted along the base soften the wall’s edge and help it blend into the surrounding landscape instead of standing apart from it.

Stone Veneer Details That Help an Exterior Look More Natural

Stone veneer details on a home exterior in Auburn Alabama showing a natural looking entryway and facade.

Stone veneer can make a house look like it was built from solid rock. Or it can look fake from the street. It all comes down to a few small choices. The material itself usually isn’t the problem. It’s the details around it, texture, pattern, color, and where it gets used, that decide whether a home looks natural or looks like a kit someone snapped together. Get those details right, and stone veneer can hold up next to real stone in almost every way that matters to the eye.

How Stone Veneer Texture Creates a More Authentic Exterior Appearance

Real stone never looks perfectly smooth. Every piece has bumps, ridges, and rough spots. Light hits those spots differently depending on the angle. Good stone veneer copies that unevenness on purpose, instead of smoothing everything into one flat, repeated surface.

Surface variation matters just as much as texture. If every piece in a veneer set looks the same, the eye picks up on that pattern fast, even from across the yard. Homeowners who want a natural finish should pick veneer with visible differences from piece to piece, not a stamped, repeated look. That one choice, more than almost anything else, decides whether a wall reads as real stone or as a product trying to pass for one.

Choosing the Right Stone Veneer Pattern for Exterior Design Balance

Pattern is where a lot of installs go wrong. Lining up veneer pieces in a tight, even grid looks ordered but fake, since real stone never lines up that neatly. Irregular placement, where different sizes and shapes sit next to each other with no clear rhythm, tends to look far more convincing.

Consistent sizing still has its place, just not everywhere. A clean, even pattern can work fine on a small accent spot, while a bigger wall usually looks better with mixed sizes and staggered joints. Mixed stone arrangements, blending a few shapes and cuts across the same wall, help avoid the repeated look that gives veneer away fast. The goal is a layout that matches how stone naturally sits when it’s stacked by hand, not how it looks when it’s cut from a mold.

Stone Veneer Color Variation and How It Affects Curb Appeal

Color does a lot of quiet work here. Real stone pulls its color from the ground it came from, so it almost never shows up in one flat, even shade. Veneer with some color variation, instead of a single uniform tone, copies that natural mix.

Complementary shades matter too. A veneer color that clashes hard with the roof, trim, or plants can look out of place, even if the texture and pattern are both done well. Homeowners get the best results by picking veneer tones that echo colors already on the property, like a roof shingle shade or a nearby stone path. That link between the veneer and its surroundings often makes an exterior feel grounded instead of tacked on as an afterthought.

Exterior Features Where Stone Veneer Creates the Biggest Visual Impact

Stone veneer doesn’t need to cover a whole house to make an impact. Entry features, like the space framing a front door, rank among the highest impact spots on a property. That’s the first thing visitors see up close, and the stone there sets the tone for everything else.

Accent walls work well too, especially on a flat, plain section that could use some weight. One wall done in stone breaks up a long stretch of siding or stucco without turning into a full exterior overhaul. Architectural details, like columns, chimney faces, or window trim, offer smaller spots that still carry a lot of visual weight. These areas let stone veneer do its job without turning into a much bigger job than a homeowner actually wanted.

Installation Details That Help Stone Veneer Maintain a Natural Look Over Time

Even great material can look off if it’s put in carelessly. Proper spacing between pieces matters more than most homeowners expect. Gaps that are too even, or too wide, throw off the rhythm that makes stacked stone look real.

Transitions need close attention too, especially where veneer meets siding, trim, or another material. A rough or obvious edge at that meeting point breaks the whole look fast. Edge treatment at corners needs extra care, since poorly finished corners are one of the fastest ways to spot fake stone from a distance. Surface prep underneath it all sets the foundation for everything else, since veneer put on an uneven or poorly prepped surface tends to shift or crack sooner than it should. Skilled work at each of these steps is often the real difference between veneer that fools the eye and veneer that doesn’t.

Frequently Asked Questions

Does stone veneer look like real stone when installed correctly? 

Yes, in most cases. Material choice, texture, and color variation all play a part, but skilled installation is what ties everything together into a look that reads as real.

What factors should homeowners consider when choosing stone veneer colors? 

Match veneer tones with existing exterior materials, landscaping, and the home’s overall style. That helps the stone feel like part of the property instead of something added on later.

Can stone veneer be used on any exterior surface? 

Not automatically. It depends on the condition of the surface underneath, what prep work it needs, and which install method fits that surface best.

How do homeowners prevent stone veneer from looking too uniform? 

Mix stone pieces of different sizes, use varied patterns instead of a tight grid, and plan the layout before installation starts. These steps help avoid the repeated look that gives veneer away.

Does professional installation affect the appearance of stone veneer? 

Yes, a lot. Layout choices, joint spacing, transitions between materials, and finishing details all shape whether the final result looks natural or looks assembled from a kit.

Where Thin Brick Works Best During a Home Renovation

Thin brick accent wall in a renovated living room in Auburn, Alabama.

Full brick is heavy. It needs a footing and a ledge to sit on. In a house that’s already built, that rules it out for most walls. Thin brick solves the problem. It’s real brick sliced thin, so it sticks to a wall like tile and gives you the brick look without the weight. For a developer updating a home, that opens up spots full brick could never touch.

Thin brick works best where you want the brick look on a surface that can’t carry real masonry. That means interior walls, backsplashes, fireplace faces and quick exterior updates. It goes on fast, adds no footing and fits tight spaces. Pick the right spot and it reads as solid brick to almost anyone.

Why Thin Brick Fits a Renovation

Thin brick gives you real brick looks without the weight or the footing. That’s what makes it a renovation material.

It’s fired clay brick, cut into thin slices about half an inch deep. It weighs far less than a full brick. That means it can go on interior walls, cabinets and other surfaces that could never hold real masonry. You bond it to a prepped surface, then grout the joints like tile.

No footing. No wall ledge. Less demo. For a home that’s already finished, that’s the whole appeal. Thin brick also comes in flat pieces and matching corner pieces, so an installer can wrap outside edges and keep the full-brick look at every turn.

Thin brick veneer being installed over a prepared fireplace surround in Auburn, Alabama.

Interior Accent Walls

An accent wall is the top use for thin brick indoors. One brick wall adds texture and warmth to a room fast.

Living rooms, dining rooms and entries all take well to a brick feature wall. So do home offices and the wall along a staircase. The trick is to pick one wall and stop there. A single brick face reads as a design choice. Four brick walls can feel like a basement. Color matters as much as placement, since a light whitewashed brick opens a room up while a dark red brick makes it feel cozy and closed in.

Installed over the right backing, thin brick sits nearly flush with the wall. It adds depth without eating floor space. That balance is why it sells so well in a remodel. Buyers walk in, see a brick wall and read the whole home as higher quality.

Kitchen Backsplashes and Feature Spots

Thin brick makes a warm backsplash with real texture. It fits kitchens going for a rustic or classic look.

Run it behind the counters and up behind the range. Wrap it around a range hood or across an island face. It gives a kitchen character that flat tile can’t match. In a rental or a flip, that character can lift the whole room.

One caution. A kitchen throws grease, steam and splashes at the wall. Seal the brick and the grout so you can wipe it clean. Skip the sealer and the joints stain fast. Keep a few spare brick pieces from the batch too, since a matching repair is easy while the same color is still on hand.

Fireplace Faces Without Heavy Demo

Thin brick can reface a fireplace without tearing out the old surround. It bonds right over the existing face.

Say a fireplace has dated tile or worn brick. Thin brick goes over it, so you skip a full demo. That saves time and keeps the mess down. The result looks like a solid brick fireplace at a fraction of the work.

One rule near a firebox. Use brick and mortar rated for heat, and follow the clearance the maker lists. A mason can tell you what’s safe for your setup. Cutting that corner is how a nice reface turns into a hazard. The same thin brick can carry up the chimney breast to the ceiling, which makes a short fireplace wall feel taller and more built-in.

Exterior Updates and Spots Full Brick Can’t Go

Outside, thin brick refreshes a facade or fills spots too tight for full brick. It gives the brick look with a slim profile.

Use it on an entry, a porch base or a band of wainscot along the front. It can wrap a post or a column where a full brick ledge was never built. On an exterior, though, the install has to handle weather. That means a proper moisture barrier and drainage behind the brick.

Get that detail right and the facade holds up for years. Get it wrong and water gets trapped behind the brick. On any outside job, have a pro set both the moisture system and the finish. It also helps to check that the thin brick you pick is rated for exterior use, since some lines are made for indoor walls only.

Frequently Asked Questions

What is thin brick? 

Thin brick is real fired-clay brick cut into thin slices. Each piece is about half an inch deep. It installs like tile, bonded to a wall and grouted at the joints. It gives the look of full brick without the weight.

Does thin brick need a footing like full brick? 

No. That’s the main reason it works in a renovation. Full brick needs a footing and a ledge to carry its weight. Thin brick bonds to the surface, so it adds almost no load.

Can thin brick go over drywall? 

Yes, with the right prep. Most installers add a cement backer board or a bonding surface first. That gives the thin brick a solid base to grip. A mason can prep the wall so the brick holds for good.

Is thin brick durable enough for a kitchen or fireplace? 

Yes, when it’s installed and sealed right. In a kitchen, seal the brick and grout so the grease wipes off. Near a firebox, use heat-rated brick and mortar. Both spots hold up well with the proper materials.

Does thin brick look fake up close? 

A good thin brick looks like a full brick, even up close. It’s real clay fired, so the color and texture are genuine. The only giveaway is the cut edge, and trim pieces hide that at corners. A clean install reads as solid brick.

Stone Columns That Add Structure to Covered Outdoor Areas

Natural stone columns supporting exposed wood beams over a covered patio in Auburn, Alabama.

A covered patio needs real support holding up the roof. Skinny metal posts can carry the load, but they look thin and temporary. Stone columns do the same structural job and look like they belong. For a developer, that mix of strength and curb appeal helps sell outdoor space. This article covers where stone columns fit, how they carry weight and what to get right before they go up.

Stone columns do real structural work. Built right, they hold up beams, roofs and heavy timber over a patio or porch. Built wrong, they’re a pretty stack of rock waiting to shift. The base and the core decide which one you get.

Where Stone Columns Earn Their Keep

Stone columns work best where a covered area needs support and good looks at once. That covers a lot of outdoor builds.

Think covered porches, patio roofs and freestanding pavilions. Think pergolas built to hold real weight overhead. A stone column can also anchor the corner of an outdoor kitchen or frame an entry. In each case, the column pairs with a wood or steel beam to hold the roof.

The draw is simple. One element does two jobs. It carries the load, and it looks solid doing it. On a spec build, that finished look can set an outdoor space apart from the plain posts a buyer sees everywhere else.

How a Stone Column Carries the Load

Natural stone veneer being installed around a reinforced masonry column supporting a covered patio in Auburn, Alabama.

A stone column moves the roof’s weight straight down to the ground. Every part of that path has to line up.

The beam rests on top of the column. The column carries that load down to a footing. The footing spreads it into the soil. Break any link in that chain and the whole cover is at risk.

Most tall outdoor columns hide a structural core inside the stone. That can be a steel post, a poured concrete center or a framed post wrapped in stone. The stone you see is the finish. The core is what really holds the beam. Ask your mason how the beam connects to that core, since a clean, hidden tie there keeps the roof anchored in wind and storms.

Solid Stone or Stone Veneer Over a Core

Most modern stone columns are veneer over a structural core. Full solid-stone columns are rarer and much heavier.

Veneer Over a Post

Here the load rides on a hidden post of steel, concrete or framed wood. Stone gets applied over that core as a finish. This build is lighter, faster and easier on the footing. It still looks like solid stone from the outside.

When Solid Stone Makes Sense

Full stone or block-and-stone columns carry the load through the masonry itself. They’re heavy, so they need a bigger footing and more skilled hands. Builders pick them for a high-end look or to match older stonework. The trade is cost and time for a fully solid feel.

One more option is manufactured stone veneer. It weighs less than natural stone and costs less too. Over a sound core, it holds up well for years.

The Footing Below Decides Everything

A stone column is only as strong as the footing under it. Skimp there and the column will move.

The footing has to sit below the frost line so winter can’t heave it. It has to be wide enough for the soil and the roof load above. On heavier columns, steel dowels tie the footing to the core so they act as one. Good drainage around the base keeps water from softening the ground.

Get the footing right and the column stays plumb for decades. Get it wrong and no amount of pretty stone will save it.

Sizing and Spacing for the Span

Column size and spacing follow the roof load and the beam span. Wider spans call for bigger columns or more of them.

A long beam over a wide patio puts real force on each column. Space them too far apart and the beam sags or the columns overload. For any roofed structure, a builder should size the columns to the actual load and local code. On bigger spans, that often means an engineer signs off.

Looks matter here too. A thick beam over skinny columns looks off, and thin beams on chunky columns look heavy. Match the column size to the beam and the space around it. The right proportion reads as solid and planned. It also keeps the roofline level and the whole cover looking built on purpose.

Frequently Asked Questions

Do stone columns need a concrete footing? 

Yes. A stone column carries roof weight down to the ground, so it needs a solid footing. That footing should reach below the frost line and match the load above. Without it, the column can settle or lean over time.

Are stone columns solid stone all the way through? 

Usually not. Most outdoor stone columns are stone veneer over a hidden core. That core can be steel, concrete or a framed post that carries the real load. The stone is the finish that gives the solid look.

Can stone columns hold up a porch or patio roof? 

Yes, when they’re built for it. A properly sized column with a strong core and a good footing can carry a beam and roof. The key is matching the column and footing to the actual load. A mason or engineer can confirm the sizes.

Is manufactured stone as strong as natural stone for columns? 

For veneer, it works well. The hidden core carries the load in both cases, and the stone face is just finish. Manufactured stone weighs less and costs less than natural stone. Over a sound core, it lasts for years with little care.

How far apart should stone columns be spaced? 

Spacing follows the beam and the roof load. Wider spans need bigger columns or shorter spacing between them. A builder sizes the spacing to the span and local code. For large covers, an engineer should set the layout.

When Brick Columns Need More Than a Surface Repair

Cracked brick porch column with footing damage and water staining in Auburn, Alabama.

A brick column can look fine on the outside and be failing on the inside. That’s the trap. Brick columns hold up porches, gates, fences and mailboxes, so a hidden problem can turn into a safety issue fast. A quick patch or a fresh coat can cover the signs for a while. It won’t fix what’s really going on.

Some column problems are skin deep. A patch handles those fine. Others start at the footing or deep in the core, and no surface fix will hold. Knowing the difference saves you from paying twice.

What Surface Repair Actually Fixes

Surface repair fixes what stays on the surface. That covers a narrow set of problems.

A mason can repoint crumbling mortar joints. They can swap a cracked face brick or patch a chipped edge. They can clean stains and seal a fine crack. These jobs work when the column below is still sound.

The catch is simple. Surface work assumes the core and the base are solid. If they aren’t, you’re painting over a problem that keeps growing. On a project with a row of matching columns, that hidden growth can spread from one to the next before anyone notices.

Cracks That Warn of Real Movement

Not every crack is skin deep. Some point to real movement in the column.

A thin hairline crack is often just age. A wide crack, a stair-step crack through the mortar, or a gap that keeps growing is a warning. That kind of crack means something shifted. The fix has to reach the cause, not fill the gap and hope.

Watch for these signs:

  • Cracks wider than a coin’s edge
  • Stair-step cracks that follow the mortar lines
  • Gaps that grow month to month
  • One side of the column pulling away

Fill a moving crack and it comes back fast. The column keeps shifting under the patch, and the new mortar just splits again. Mark the ends of a crack with a pencil and a date, then check it in a month. If the line has moved past your mark, the column is still on the move.

A Leaning or Bulging Column Means Trouble Below

Brick column opened for structural repair, revealing rusted steel reinforcement and a deteriorated masonry core in Auburn, Alabama.

A column that leans or bulges has a problem at the base. No surface fix will straighten it.

Columns sit on a footing below the ground. When that footing settles, sinks or heaves, the column tips with it. Poor drainage around the base is a common cause. Water softens the soil, and the weight does the rest.

A bulge is its own warning. It can mean the core is breaking apart or the brick is pushing outward. Either way, the load path is failing. That calls for a mason to open it up and look, not smear on more mortar. A quick way to gauge a lean is to hold a level against two sides, since a column should read plumb top to bottom.

Water and Rust Inside the Column

Many brick columns aren’t solid. Some have a hollow core. Others hide a steel post or rebar inside. Water is the enemy of both.

A Failed Cap Lets Water In

The cap is the column’s roof. When it cracks or goes missing, rain runs straight into the core. That water sits, freezes and expands. Over a few winters, it pushes the brick apart from the inside.

Rusting Steel Breaks Brick Apart

Hidden steel rusts once water reaches it. Rust takes up far more room than clean steel. As it swells, it cracks the brick around it and pushes the faces outward. A patch on the surface does nothing to stop the rust working below it. Left alone, the swelling can split a column open along its full height.

Repair or Rebuild: How to Make the Call

When the damage reaches the base or the core, a rebuild often beats another patch. Repeated patching costs more over time.

A mason may rebuild just the top section down to sound brick. A worse case needs a full teardown and a new footing. Good rebuilds also fix the cause. That means a solid cap, better drainage and rust-free steel or ties.

Signs a rebuild is the smart call:

  • Cracks that return after every repair
  • A clear lean or a growing bulge
  • A soft or crumbling core
  • Rust stains bleeding through the brick

Have a mason inspect before you decide. A short look now can keep a column from coming down later. Ask them to price both the patch and the rebuild, so you can weigh the real cost of each against how long you plan to keep the property.

Frequently Asked Questions

What causes a brick column to crack? 

Cracks come from movement, water or age. A settling footing or shifting soil pulls the brick apart. Trapped water freezes and expands inside the column. Rusting steel in the core can also crack the brick outward.

Can I just patch a cracked brick column myself? 

You can patch small, stable cracks that are only cosmetic. A moving crack, a lean or a bulge needs a mason. Those signs point to damage below the surface. Patching them only hides the problem while it grows.

How do I know if my column has steel inside? 

Many columns built as gate or fence posts hide a steel post or rebar. Rust stains on the brick are a strong clue. A mason can check with a probe or a metal scanner. Knowing what’s inside changes how the repair is done.

Why does water damage a brick column so fast? 

A column takes water from the top and the sides. A cracked or missing cap lets rain pour into the core. That water freezes, expands and works the brick loose. It also rusts any steel hidden inside.

Is it cheaper to repair or rebuild a brick column? 

Small surface repairs are cheaper up front. But if the base or core is failing, repeated patches add up fast. A proper rebuild fixes the cause and lasts far longer. Over time, that usually costs less than patching again and again.

Stone Steps That Make Sloped Yards Easier to Use

Natural stone steps with textured treads and a landing built into a landscaped sloped yard in Auburn, Alabama.

A yard with a steep slope can be a pain to walk across, especially after rain. Stone steps fix that problem by turning an awkward hill into a path people actually want to use. Some yards have enough grade change between the house, the driveway, and the back lawn that a simple dirt path just doesn’t cut it anymore. Getting the layout right takes more than picking pretty stones. It means thinking about where people actually walk, how steep the climb feels, and whether the stairway will hold up season after season. Here’s what goes into planning stone steps that work with a slope instead of fighting it.

Plan the Stone Step Route Around How the Yard Is Used

The first mistake homeowners make is picking the shortest line down the hill and building steps there. That sounds efficient, but it ignores how people move through a yard. A good staircase should connect places people actually go: the driveway, a side gate, a garden bed, the lower lawn, or an outdoor seating area near the back of the house.

Watching how family members already cross the slope helps here. If everyone naturally cuts across a certain path to reach the mailbox or the shed, steps placed along that route will feel obvious rather than forced. Steps placed somewhere else, even if it looks tidier on paper, often get ignored. People will keep crossing the steep, worn section they’re used to, and that worn patch will only get worse over time.

Match the Step Rise and Tread Depth to the Slope

Once the route is set, the math starts. Total elevation change and the horizontal distance available determine how many steps fit and how big each one needs to be. A slope that drops six feet over twenty feet of yard needs a very different step count than one that drops six feet over eight feet.

Riser height matters more than most people expect. A riser that’s too tall makes each step feel like a small climb. Uneven risers are worse. Even a half-inch difference between two steps can trip someone who isn’t paying attention. Tread depth needs the same care. A tread that’s too shallow forces an awkward, choppy stride, especially on a long hillside stairway where dozens of steps are involved. Consistent dimensions from top to bottom make the whole climb feel natural instead of jarring.

Add Landings Where the Climb Needs a Break

A long, unbroken run of stone steps can feel exhausting, even if each individual step is well built. Landings solve this by splitting the staircase into shorter sections with a flat spot to pause on.

Landings work especially well near a change in direction. If the stairway has to bend around a tree or follow the natural curve of the hill, a landing at that turn gives people solid footing before they change course. They’re also useful near gates or garden entrances, where someone might stop to open a latch or set down tools. On a particularly steep stretch of yard, a landing partway up breaks the intensity of the climb without turning the whole project into a patio. The goal is a resting point, not an extra destination.

Choose Stone Treads That Provide Stable Footing

Not every stone works as a step. Thickness matters because thin stone can crack under repeated weight, especially outdoors where temperature swings and moisture add stress. Surface texture matters just as much. A smooth, polished stone looks nice in photos but turns dangerous the moment it gets wet.

Usable width counts too. A tread that’s technically walkable but only a few inches wide doesn’t leave room for a full footstep, and that forces people to watch their feet instead of walking normally. Edge shape plays a role as well, since sharp or uneven edges can catch a shoe or a cane. Every stone needs to sit firmly on a properly prepared base. A rocking stone, even a small wobble, is one of the fastest ways to turn a nice staircase into a hazard.

Fit the Steps Into the Existing Grade and Landscape

Stone steps look best when they seem like they were always part of the hill, not dropped on top of it after the fact. That means recessing each step into the slope rather than stacking stone on the surface and hoping the sides hold.

The top and bottom of the staircase need to meet the existing grade smoothly, without an awkward lip or a sudden drop where the steps end. Planting areas near the route deserve some thought too. A staircase that cuts straight through an established garden bed, ignoring root systems and existing plants, tends to look out of place even with excellent stonework. When the steps follow the natural contour of the yard and leave surrounding greenery intact, the whole thing reads as landscaping rather than construction dropped into a hillside.

Frequently Asked Questions

How steep can a yard be before stone steps are useful?

Stone steps start making sense once a slope is steep, slippery, or uneven enough that a regular path feels uncomfortable to walk. The exact layout still depends on how much space is available and how much the elevation actually changes.

How many stone steps will a sloped yard need?

The number comes from math, not guesswork. Total vertical rise divided by the chosen riser height gives the step count, and that number shifts depending on how tall each riser is built.

Do long outdoor stone stairways need landings?

Landings help on longer climbs by giving people a flat spot to pause and by dividing the staircase into shorter, more manageable sections. They’re especially useful anywhere the path changes direction.

What type of stone surface works best for outdoor steps?

Durable stone with a naturally textured surface holds up better underfoot than polished stone, which gets slick when wet. Deeply irregular material can also be tricky to walk on safely.

Can stone steps follow a curved route through a yard?

Yes, a gentle curve can follow the shape of the land and connect different areas of the yard naturally. The tread size and walking space just need to stay consistent throughout the curve, not only on the straight sections.

Why Brick Steps Become Loose and Uneven Over Time

Loose and uneven brick steps with cracked mortar, shifted treads, and visible settlement near a home entrance in Auburn, Alabama.

Brick steps can look solid for years and then start to wobble underfoot. One tread rocks a little, a corner sits higher than it used to, and the whole staircase suddenly feels off. Most of the time, the loose brick you notice is only the surface of the problem. The real cause usually sits below the steps or inside the joints holding them together. Knowing what actually moves your brick steps helps you fix them once instead of patching the same spot every year. Here is what tends to go wrong, and why.

How Settlement Beneath Brick Steps Creates Uneven Treads

Every set of brick steps rests on a base of packed soil or fill. When that base wasn’t compacted well during the build, it slowly gave way under the weight above it. Different parts of the ground can sink at different speeds, so one section of the stairs drops while another stays put. That uneven drop is what leaves you with tilted treads and a gap where things used to line up.

Water makes this worse over time. Rain that flows under or around the steps can wash out small amounts of soil with every storm. As that soil disappears, the support beneath the bricks shrinks, and the masonry follows it down. This is why erosion often shows up as sinking on the side that faces the downhill flow.

Resetting only the bricks you can see rarely fixes this kind of movement. The bricks look fine again for a while, but the ground below keeps shifting. Unless the base gets rebuilt or re-supported, those same treads will sink again.

Why Mortar Joints Lose Their Grip on Individual Bricks

Mortar is the glue that holds each brick in place, and it doesn’t last forever. Years of foot traffic send small shocks through the steps every single day. Add in weather, freeze and thaw cycles, and plain age, and the mortar slowly turns brittle and starts to crumble. Once the bond weakens, a brick that used to sit tight begins to rock.

The bricks at the edges usually loosen first. Step corners and the front lip of each tread take the most direct pressure from feet landing on them. Landing areas at the top and bottom of the stairs also get heavy use, so their joints wear down sooner than the ones in the middle. Crumbling mortar is one of the most common reasons masonry units drift out of position.

You can often catch this early. Look for thin cracks in the joints, missing bits of mortar, or a light gray dust near the base of a brick. Those small signs tend to show up before a brick actually comes loose.

How Poor Step Geometry Concentrates Pressure

Not every problem starts underground. Sometimes the way the steps were built puts too much weight on too little support. Treads that vary in depth, risers that don’t line up, and mortar beds spread too thin all create weak points. When one small area carries more load than it should, that area gives out first.

Picture a tread whose front edge hangs out past its support. Every footstep presses down on that unsupported lip with nothing solid beneath it. Over months and years, the repeated pressure cracks the joint and lets the brick begin to rock. A staircase built with uneven geometry basically picks its own failure points.

These flaws often hide until the steps see real use. A stair that feels fine when new can develop rocking bricks and cracked joints once thousands of footsteps have done their work. The uneven walking surface you feel later was usually built into the stairs from the start.

When Nearby Structures Pull Brick Steps Out of Alignment

Brick steps rarely stand completely on their own. They usually connect to a porch, a foundation, a walkway, a landing, or a railing post. Each of those pieces may have been built at a different time and on a different base. When two connected structures settle at different rates, something has to give at the point where they meet.

That meeting point is where cracks and height changes tend to appear. You might see the steps pulling away from the porch, or a lip forming where the walkway meets the bottom tread. A railing post that shifts can drag nearby bricks along with it. These gaps are a sign that the movement is coming from the connection, not just the steps.

Fixing the visible crack alone usually misses the real story. If the porch or foundation keeps moving, the same separation opens back up. That connection needs to be checked before anyone patches the masonry between them.

Why Earlier Spot Repairs Sometimes Fail Again

Patching one loose brick feels like a quick win, and for a little while it is. A mason scrapes out the old mortar, packs in fresh material, and the brick sits tight again. The trouble comes when the base, the neighboring bricks, or the step structure is still moving. Fresh mortar can’t hold a brick still while everything around it keeps shifting.

That’s why the same brick, or the one right beside it, often loosens again within a season or two. Each repair treats the symptom while the real cause sits untouched below or beside it. Homeowners can end up paying for the same small fix over and over.

When looseness keeps spreading across several bricks, the stairs are telling you something bigger. At that point, a full look at the base, the connections, and the step layout makes more sense than another patch. A mason who inspects the whole assembly can find the source instead of chasing it one brick at a time.

Frequently Asked Questions

Why does only one brick step move when the others feel solid? 

One brick can move on its own for a few reasons. It may have a failed mortar bond, weak support directly beneath it, or more foot pressure than the bricks around it. Corner and edge bricks are especially prone to this because they take concentrated weight. Still, a single moving brick can be an early warning of a wider support problem, so it’s worth watching.

Can loose brick steps be caused by foundation movement? 

Yes, movement in a nearby foundation or porch can travel into attached steps. This happens most when the two structures sit on different bases and settle at different rates. As one side shifts, it pulls or pushes the steps connected to it. The source of the movement should be found before the visible brick gets repaired.

Does repointing always fix loose brick steps? 

No, repointing only replaces worn mortar in the joints. That helps when tired mortar is the whole problem, but it does nothing for a sinking base, lost support, or movement between connected structures. If the ground or the porch keeps shifting, fresh joints will crack again. The repair has to match the real cause, not just the surface.

When should several uneven steps be rebuilt rather than patched? 

Rebuilding starts to make sense when the problems stack up. Multiple treads have shifted, the base has settled, joints keep failing, or the steps no longer hold even tread and riser heights. At that stage, patching one brick at a time rarely keeps up. A mason should inspect the full staircase before deciding between a repair and a rebuild.

What Homeowners Should Consider Before Building a Retaining Wall

Retaining wall cutaway showing drainage stone, filter fabric, and a perforated pipe installed behind the wall on a landscaped slope in Auburn, ALabama.

Water is the number one reason a retaining wall fails. Even a well-built wall can lean, crack, or slide once water starts building up behind it, and that risk climbs on a slope where rain runs downhill and presses against the soil. So before you build a retaining wall, you need a solid plan for where all that water will go. Good drainage is what keeps the wall standing straight for years instead of months. Here are the main things smart homeowners should think through before the first block goes down.

Send Hillside Runoff Away Before It Hits the Wall

Rain running down a slope carries real force, and when it reaches the soil behind your wall, that soil grows heavy and waterlogged. Saturated soil pushes hard against the structure, and that constant pressure is what breaks walls over time. The smartest approach is to stop the water before it reaches the back of the wall.

You have several simple tools for this. A swale is a shallow dip that guides water off to the side, while a berm is a small raised mound that blocks the flow and steers it away. Careful grading shapes the ground so rainwater travels around the wall instead of into it, and a surface drain can capture runoff near the top of the slope.

None of these features expect the wall to handle everything alone. The wall’s internal drain still plays a role, but it should only deal with whatever water slips past your first line of defense. When you reduce how much water reaches the soil, the entire system holds up far longer.

Build a Free-Draining Layer Behind the Wall

Behind every well-designed retaining wall sits a column of clean drainage stone. This is not ordinary dirt or fine sand, but washed rock with plenty of open space between each piece, so water moves through it quickly and drops toward the base.

That open stone gives water a fast, direct path to the bottom of the wall. Without it, moisture lingers in the soil and presses steadily against the blocks, and over time that pressure can bow the wall outward or crack the masonry units. Think of the stone as a dedicated fast lane that keeps water from pooling against the structure.

Many builders wrap this stone zone in filter fabric for extra protection. The fabric prevents fine soil particles from washing into the rock and clogging the gaps that let water escape. As a result, the drainage layer keeps working properly for years rather than slowly filling with silt.

Place the Drainpipe Low on a Sloped Yard

A perforated pipe usually runs along the base of the wall, and this is known as a toe drain. Perforated simply means the pipe is lined with small holes that let water seep inside. Because water collects at the lowest point, the pipe must sit low enough to catch it, since a pipe placed too high leaves water pooling underneath where pressure keeps building.

On a slope, the type of soil changes how carefully you have to plan. Poorly draining soil such as heavy clay holds onto water and demands extra attention, while tall walls and reinforced walls carry heavier loads that often call for a fully designed system. In those situations, a professional should map out both the pipe layout and its depth.

Getting the pipe height correct is not something to eyeball. Even a few inches too high can quietly undo the entire drainage plan, so this is a step worth slowing down for. A little care now can save you from an expensive rebuild later.

Give the Water a Safe Way Out Downhill

A drainpipe only earns its keep when the water it collects has somewhere useful to go. Ideally the pipe leads to a lower spot on the property, a stormwater system, or another approved outlet that can handle the flow. If it simply ends in the same soil it was draining, you have relocated the problem rather than fixing it.

You also need to protect wherever that water comes out. Erosion can wear away the ground around the outlet, while leaves, mulch, and dirt can clog the opening, and animals sometimes build nests inside an open pipe. A simple grate or screen goes a long way toward keeping everything clear.

Landscaping work is another threat that people often overlook. A crew planting shrubs might bury or crush the outlet without ever realizing it was there. Marking the spot and checking on it once in a while keeps the whole system flowing.

Handle Water Between Stacked Walls

Some yards rely on two or more walls stacked up the slope, and these tiered walls end up sharing their water. Rain landing on the upper level runs down toward the level below it, so ignoring that flow puts real strain on the lower wall.

Each tier deserves its own plan for catching and moving water. Runoff from the upper terrace should be intercepted and redirected before it reaches the next wall down, and a swale or drain set between the levels handles this nicely. The main goal is to keep the soil separating the tiers from turning into saturated mud.

When that middle soil soaks through, both walls feel the added weight and pressure. The lower wall tends to fail first because it carries the greatest load. Planning each level as its own drainage system spreads the risk instead of piling it onto a single wall.

Frequently Asked Questions

Does every hillside retaining wall need a drainpipe? 

Not every small wall relies on the same drainage setup. Even so, walls built on slopes, walls sitting in poorly draining soil, and reinforced walls usually need extra help with water. Many walls taller than four feet also call for a toe drain or a professionally designed drainage plan. When you are unsure, a qualified professional can tell you what your particular site requires.

Can surface grading replace drainage behind the wall? 

No, because the two systems handle different jobs. Surface grading steers rainwater away before it soaks into the retained soil, while the drainage layer and pipe manage whatever water still reaches the wall. The two work best as a team, so leaving one out creates a weak point. Relying on grading alone usually means water builds up where you cannot see it.

Where should retaining wall drainage water discharge? 

The outlet should lead to a safe, lower area of the property or an approved point designed to receive the flow. A stormwater connection often works well for this purpose. The key rule is that the discharged water should never cause erosion or flooding somewhere else. A good outlet solves your problem without quietly creating one for a neighbor.

Why is filter fabric used in retaining wall drainage? 

Filter fabric keeps fine soil separated from the clean drainage stone behind the wall. Without it, tiny dirt particles wash into the rock and clog the open spaces that let water pass. Once those gaps fill in, the stone can no longer move water quickly. The fabric preserves that clear drainage path for the long haul.

Should downspouts empty behind a hillside retaining wall? 

No, roof water should never be dumped directly behind the wall. A downspout delivers a large, concentrated rush of water into one spot, and that surge saturates the retained soil almost instantly. Instead, route the roof runoff well away from the wall toward a safe area. Every concentrated water source deserves a place in your overall drainage plan.

Stone Pavers for Durable Commercial Walkways

Stone pavers forming a durable commercial walkway outside modern retail and office buildings

Commercial walkways experience constant foot traffic and must withstand years of daily use while maintaining a professional appearance. Stone pavers are a durable paving option that can provide long-term performance when properly selected and installed. Their modular design also makes individual repairs easier if damage occurs. For commercial properties, choosing the right paver material and building a properly prepared base are important steps in creating walkways that remain functional, attractive, and easier to maintain over time. 

Why Stone Pavers Suit Commercial Walkways

Stone pavers handle heavy use better than many surfaces. Each paver is a solid unit, so the path spreads weight across many small pieces instead of one large slab. When concrete cracks, you see a long ugly line and often have to replace a whole section. When a paver cracks, you swap out that single unit. That difference matters on a busy commercial site where downtime and repairs cost money.

Pavers also flex with the ground. Soil shifts with weather and time, and a rigid slab fights that movement until it cracks. A paver surface moves a little without failing, since the joints between units absorb small shifts. This keeps a walkway smooth and safe longer, which cuts down on both repairs and trip hazards. Fewer trip hazards also means fewer complaints and fewer liability worries for a property owner.

Choosing the Right Stone for Traffic

Not every stone stands up to constant foot traffic, so the choice matters. Harder, denser stones resist wear and hold their surface under heavy use. Softer stones can wear smooth or chip faster in a commercial setting, which shortens the life of the path. Picking a stone rated for the traffic you expect is the first durability decision, and it’s worth getting right.

Surface texture counts too. A walkway needs enough grip to stay safe when wet, especially where the public walks. Very smooth stone can turn slick in rain, which is a real hazard on a commercial route. A stone with some natural texture, or a finish that adds grip, keeps footing sure in all weather. Matching the stone to the job protects both the path and the people on it, and a safe surface is part of what durability really means.

The Base Is Where Durability Lives

The strongest pavers fail on a weak base, so the ground prep is where a walkway is won or lost. A commercial paver path needs a deep, well-compacted base of crushed stone under it. This base carries the load and lets water drain away. Skimp on it and the surface will sink, shift and heave no matter how good the pavers are. Most failed paver paths trace back to a base that was too thin or poorly compacted.

Drainage is part of the base too. Water that sits under pavers softens the ground and pushes them out of place, especially through freeze and thaw. A proper base sheds water and holds its shape season after season. Edge restraints then lock the pavers in from the sides so the path doesn’t spread over time. Get the base right and the surface lasts for decades. Get it wrong and no surface repair will save it.

Meeting Commercial Standards and Access Rules

Commercial walkways answer to rules that home paths don’t. Public routes usually have to meet accessibility standards, which set limits on surface smoothness, gaps and slope. Pavers can meet these rules, but only if they’re chosen and laid with the standards in mind. Wide joints or uneven units can fail an accessibility check and force a costly redo.

Slope and surface evenness carry the most weight here. A walkway has to drain without being too steep, and it has to stay flat enough for wheels and canes. A person using a wheelchair or a cane needs a firm, even path with no lip to catch on. Planning for these limits during design avoids a failed inspection or an expensive rebuild. A paver walkway that meets the rules serves everyone and keeps the property clear of complaints and legal trouble.

Keeping a Paver Walkway Looking Good

A paver walkway needs some care to stay sharp, but the upkeep is simple. Sweeping and the occasional rinse keep dirt from grinding into the surface. Joint sand may need topping up over the years to keep the pavers locked together. These small tasks cost little and add years of life to the path.

Repairs are where pavers shine. When a unit stains or cracks, you lift it and set a new one, and the fix disappears into the path. There’s no patch that never quite matches, which is the usual result with concrete. This easy repair keeps a commercial walkway looking clean and cared for long after other surfaces would show their age. A property that looks maintained sends a message to tenants and customers, and pavers make that easy to keep up.

Weighing Cost Against Long-Term Value

Stone pavers cost more up front than poured concrete, and that gap is worth understanding. The higher price buys a surface that lasts longer, repairs cheaper and looks better for its whole life. On a commercial property held for years, those savings often close the gap and then some. The real comparison isn’t the install price. It’s the total cost over the life of the walkway.

Downtime is part of that math too. Replacing a cracked concrete section means closing off the area, breaking out the old slab and pouring new, then waiting for it to cure. Swapping a paver takes minutes and keeps the path open. For a business that depends on foot traffic, keeping walkways usable has real value. When you count durability, repair ease and appearance together, pavers earn their price on a commercial site.